Payroll Advance

Create employee advances and repayments

Article ID: 1000672

Overview

You can use QuickBooks Desktop to give an employee an advance on upcoming pay (using cash, check, or credit), which can then be reimbursed to the company through payroll deductions.

  • How to create a regular (non-paycheck) check for an advance.
  • How to set up a deduction to pay back the advance.
  • How to create a report to track employee loan balances.
  • How to manage employee loans that will be repaid over time, via several paychecks.

Expected Outcome

You will be able to pay the employee the advance amount and reimburse the company for that amount.

Assumptions

You have an active payroll subscription and would like to pay an employee an advance payment of their regular payroll.

Details

To pay an advance on a Write Check:

1

Create a regular (non-paycheck) check for an advance.

  1. From the QuickBooks Desktop Banking menu, select Write Check.
  2. Select the bank account from the Bank Account drop-down list.
  3. Select the date for the check.
  4. Select the employee from the Pay to the Order of drop-down list, and click OK in the warning screen. Note: The advance check is a regular check and will not affect payroll taxes.
  5. Enter the dollar amount of the advance below the check date.
  6. Select the account from the Expense tab Account drop-down list.(Note: The account for this should be the same as the account that will be used to pay back the advance so that the accounting portion of it is correct and is usually an asset account or other current asset account). Optional: Select the class from the Expense tab Class drop-down list if you want the check to affect a class.
  7. Check the Print Later box next to the Print icon.
  8. Click Save & Close.
2

Print the check.

  1. From the File menu, select Print Forms, and click Checks. Note: If the check does not appear in the Select Checks to Print window, make sure the customer has the correct bank account selected in the Bank Account drop-down list, and make sure the customer checked the Print Later box next to thePrint icon.
  2. Edit the First Check Number if necessary.
  3. Make sure the check has a checkmark in the far left column, and click OK.
  4. Make any necessary printer changes, and click Print.
3

Set up a deduction payroll item to pay back the advance.

    1. From the QuickBooks Desktop menu at the top, click Lists > Payroll Item List.
    2. Select the Payroll Item button, and click New.
    3. Select Custom Setup, and click Next.
    4. Select Deduction, and click Next.
    5. Enter the name of the payroll item that will be easily identifiable (such as Advance Payback), and click Next.
    6. Leave the first two fields blank, select the account which will be affected by this payroll item in the Liability account drop-down list (Note: The account for this should be the same as the account that was used to give the advance so that the accounting portion of it is correct and is usually an asset account or other current asset account), and click Next.
    7. Make sure None is selected in the Tax Tracking Type window (this payroll item will not affect taxes as it is being deducted from the net pay), and click Next.
    8. Leave the taxes unchecked, and click Next.
    9. Select Neither in the Calculate based on quantity screen, and click Next.
    10. Select Net pay, and click Next.
    11. Click Finish.

Note: You should only enter a default rate and limit if the rate and limit will apply to everyone using the item. Otherwise, you should enter the rate and limit in the employee's profile.

4

Create a paycheck with the cash advance repayment.

  1. From the Employees menu, select Pay Employees.
  2. Select the employee and click Open Paycheck Details.
  3. In the Preview Paycheck make sure you are paying the employee for the full pay period, in which the cash advance was taken.
  4. Go to the second column on the left, other payroll item. Click under payroll item and use the drop down arrow to select Cash Advance Repayment.
  5. Enter the dollar amount from the cash advance in the Rate column. Your employee should either have a 0 check, or it should be smaller then normal in the net amount(you can never issue an employee a negative check). You may need to adjust the employee's FIT and or SIT. If you still have a negative check, you may have to take this out on another check(s).

To pay an advance on a paycheck:

Use Easy Set Up to set up and pay an advance.

Easy Set Up in QuickBooks Desktop will create two payroll items: Cash Advance and Cash Advance Repayment.

To create Advance payroll items in Easy Set Up:

      1. From the QuickBooks Desktop menus at the top, click  Lists > Payroll Item List.
      2. At the lower left of the Payroll Item List, click Payroll Item > New .
      3. Select EZ Setup , and click Next.
      4. Select Other Addition for the item type, and click Next .
      5. Follow the on-screen set-up, which will ask you a series of questions based on the item type. (On the right side of each screen there are help topics that can assist you with the setup.) When you click Finish , the Payroll Setup window closes, and a blank screen is displayed in QuickBooks Desktop.

To create a paycheck with the Cash Advance addition item.

  1. From the Employees menu, select Pay Employees.
  2. Select the employee and click Open Paycheck Details .
  3. In the Preview Paycheck make sure you are paying the employee for the full pay period.
  4. Go to the second column on the left, other payroll item . Click under payroll item and use the drop down arrow to select Cash Advance .
  5. Enter the dollar amount from the cash advance in the Rate column.
  6. Continue creating paychecks.

To create a check with the cash advance repayment.

  1. From the QuickBooks Desktop menus at the top, click Employees > Pay Employees.
  2. Select the employee, and click Open Paycheck Details .
  3. In the Preview Paycheck make sure you are paying the employee for the full pay period, in which the cash advance was taken.
  4. Go to the second column on the left, other payroll item . Click under payroll item and use the drop down arrow to select Cash Advance Repayment .
  5. Enter the dollar amount from the cash advance in the Rate column. Your employee should either have a 0 check, or it should be smaller then normal in the net amount (you cannever issue an employee a negative check). You may need to adjust the employee's FIT and or SIT. If you still have a negative check, you may have to take this out on another check(s).

Additional Information:

Create a report to track employee loan balances (QuickBooks Desktop Pro and Premier only).

  1. Create a custom Payroll Summary Report.
  2. Click on Reports on the top menu bar
  3. Select Employees and Payroll.
  4. Select Payroll Summary Report.
  5. Click on Customize Report in the upper left corner.
  6. On the Display tab, choose All Dates.
  7. Select Payee in the Display columns by drop-down menu.
  8. Check % of Row.
  9. Click on the Filter tab.
  10. Select Accounts, and select the asset account used for the Employee Loans on the drop-down menu.

Manage employee loans that will be re-paid over time (on multiple paychecks).

  1. Edit the employee.
  2. Change tabs to Payroll and Compensation info.
  3. Under Other Payroll Items, select the employee advance repayment payroll item.
  4. Enter the amount to be paid by paycheck in the Amount column.
  5. Enter the balance remaining to be paid at this point into the Limit column.
  6. Increase the amount in the Limit column if there are any new loans or advances given to the employee. QuickBooks Desktop then automatically deducts this repayment on each paycheck, so the payroll administrator should not worry about forgetting it, and QuickBooks Desktop will stop the deduction once the limit has been reached.

Note: This same method can be used for tracking Uniform allowances or purchases, etc.

Reference
http://payroll.intuit.com/support/kb/1000672.html

VHS-C Shell Repair

Here's a great link to such: http://goughlui.com/the-vhs-corner/mini-me-vhs-c-teardown-adapter/

Mini-Me: VHS-C Teardown & Adapter

While the regular VHS tape was a book-sized cartridge holding up to about 5 hours of tape, it had a smaller relative known as VHS-C, where the C stood for compact. This was a small sized VHS cassette intended for use with camcorders and initially came in lengths of 30 minutes, extending to 45 minutes by the time VHS-C was overtaken by (primarily) Video8/Digital8 and miniDV.

VHS-C cassettes contained the same sort of tape inside, and recorded video in the same way as regular VHS, allowing for mechanical adapters to allow VHS-C cassettes to be played in full size VHS decks – an advantage that the other formats at the time did not have.

Thanks to visiting a thrift store, and finding a few VHS-C cassettes which I promptly purchased, I’ve been able to compile this unboxing and teardown of a VHS-C cassette, along with a look at it inside a VHS-C to VHS adapter.

The VHS-C Cassette

01-2016012810432263-670x102402-2016012810442265

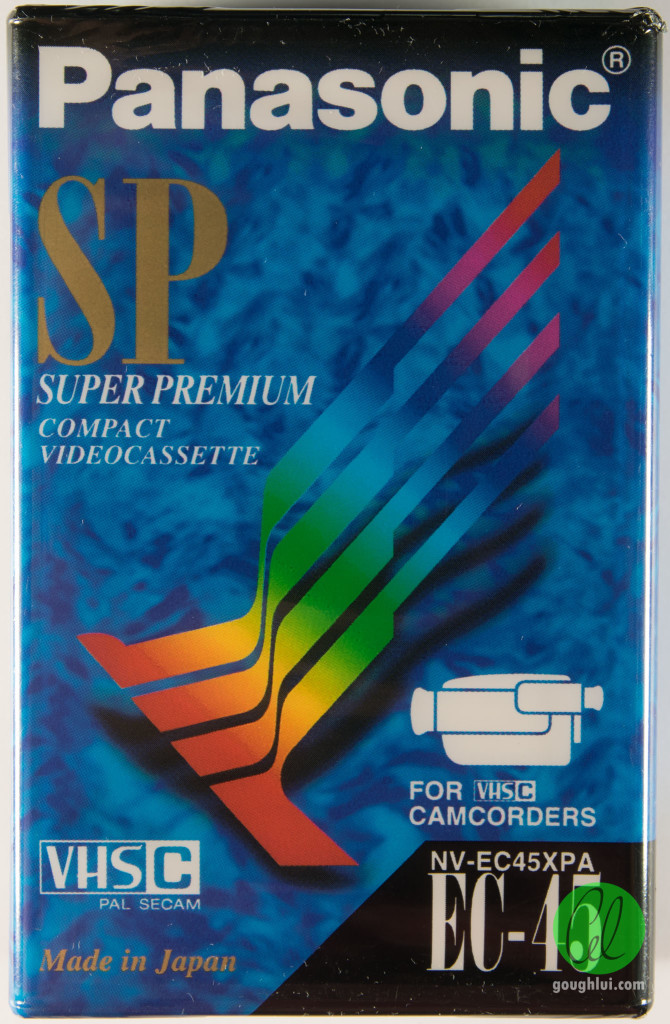
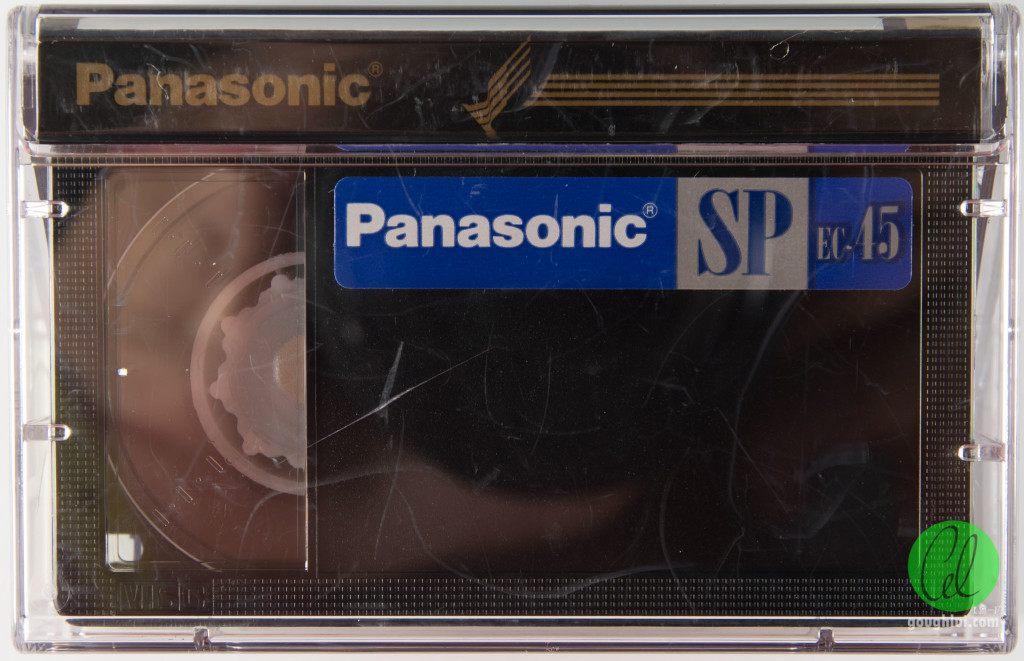
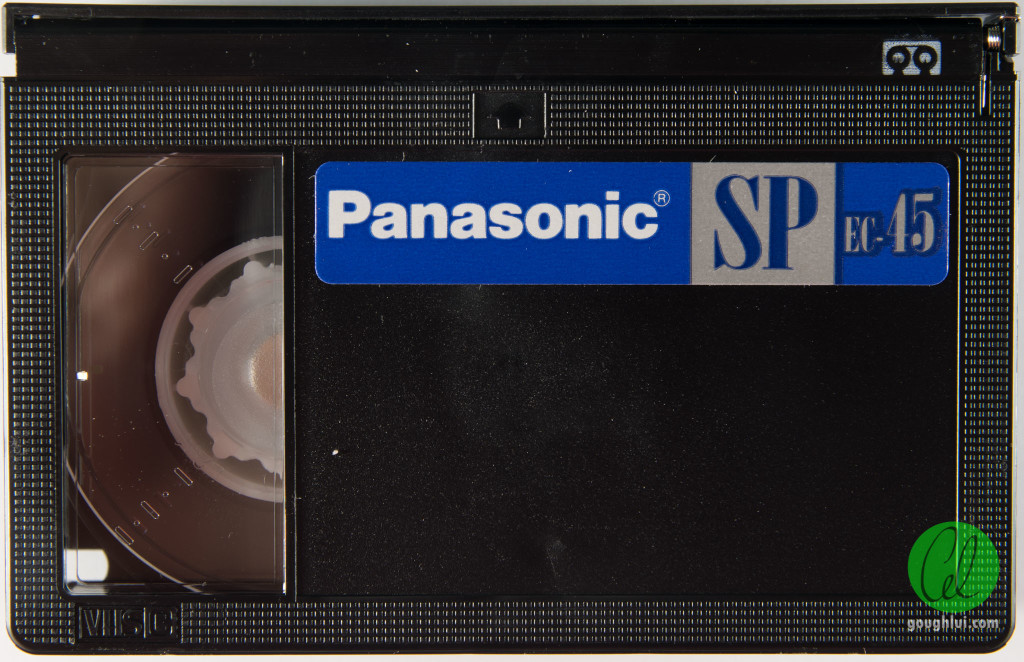
This is a Panasonic SP EC-45 VHS-C cassette, Made in Japan. This particular cassette is a later-model cassette. We know this because the 45-minute (PAL) length was not available in the early days of VHS-C. I still remember the JVC XR 30-minute cassettes that my Dad used to film my childhood, although I have no idea where they are now. The earlier cassettes also featured break-off write-protection tabs similar to the full-size VHS cassettes, with later cassettes featuring slide-switches (similar to floppy disks) instead. This one also had the safety lock anti-slack system, which early cassettes did not have.

03-2016012810432262 04-2016012810432264-1024x289 05-2016012810442266-1024x288

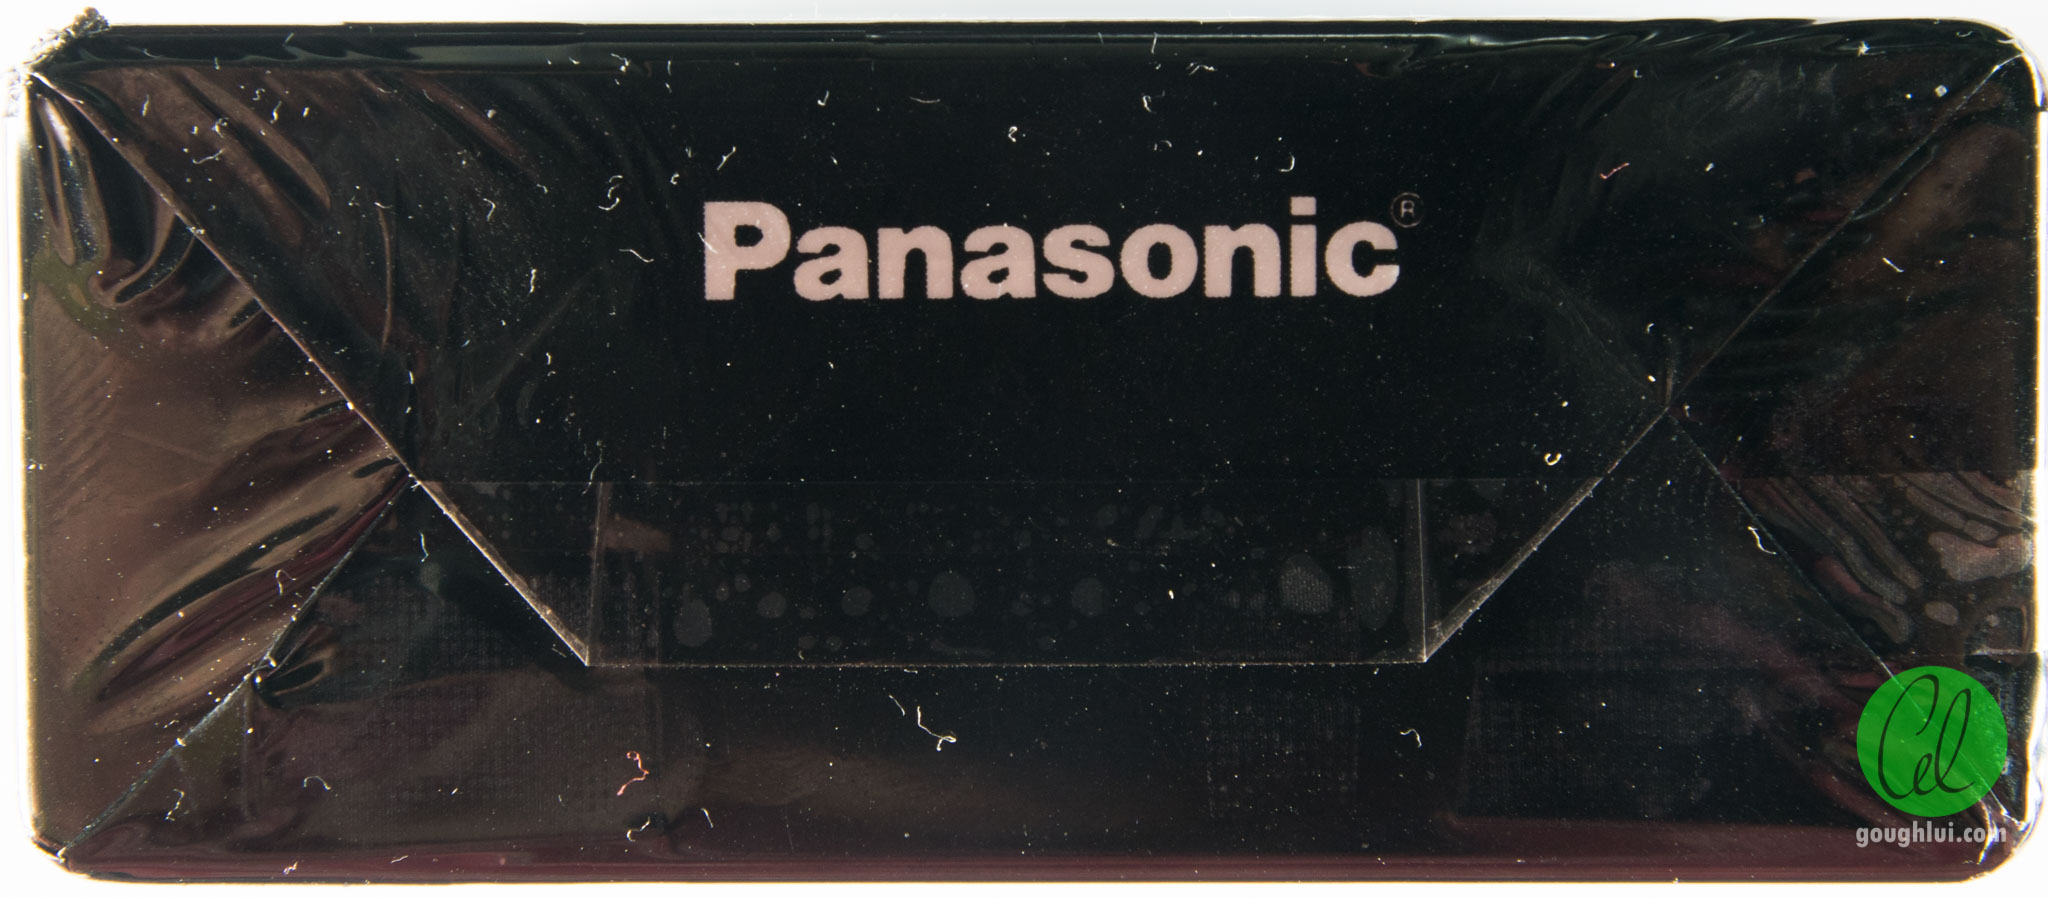
The whole cased cassette is covered by a printed cellophane wrapping, which has an easy open “cut”. After all the transport, there are a few nicks in the corners. I suppose now, it’s time to tear it off and unveil what’s inside.

06-2016012810442267-1024x661

This particular cassette was housed inside a jewel case style plastic hinged case similar to an audio cassette

. This type of plastic loves to crack and shatter when subject to impact – I remember the old JVC XRs came with a flexible plastic case instead.

07-2016012810452268-1024x288 08-2016012810452269-1024x662

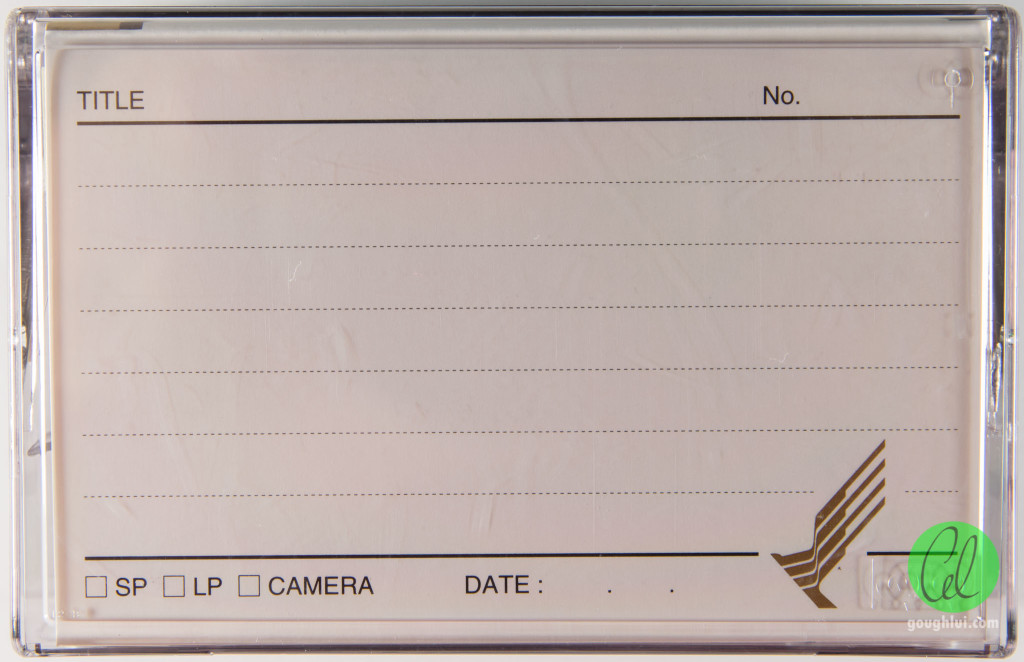
The inside card has spaces for noting down details about the recording, in case you were to store them all in a library. The case itself has the safety-lock logo pressed into it as well.

09-2016012810452271-1024x309

There are some spines along the edge to keep the cassette nicely aligned in the case.

10-2016012810472275-1024x662

The top of the cassette has part of the labelling area occupied by a branding label from the factory. The more exquisite cassettes often had slightly different layouts at the top, and instead had factory printed brandings on the shell. Again, the safety lock logo is printed on the cassette. The VHS-C logo is embossed in the corner, and the tape-cover flap return spring is visible in the top corner.

11-2016012810472277-1024x651

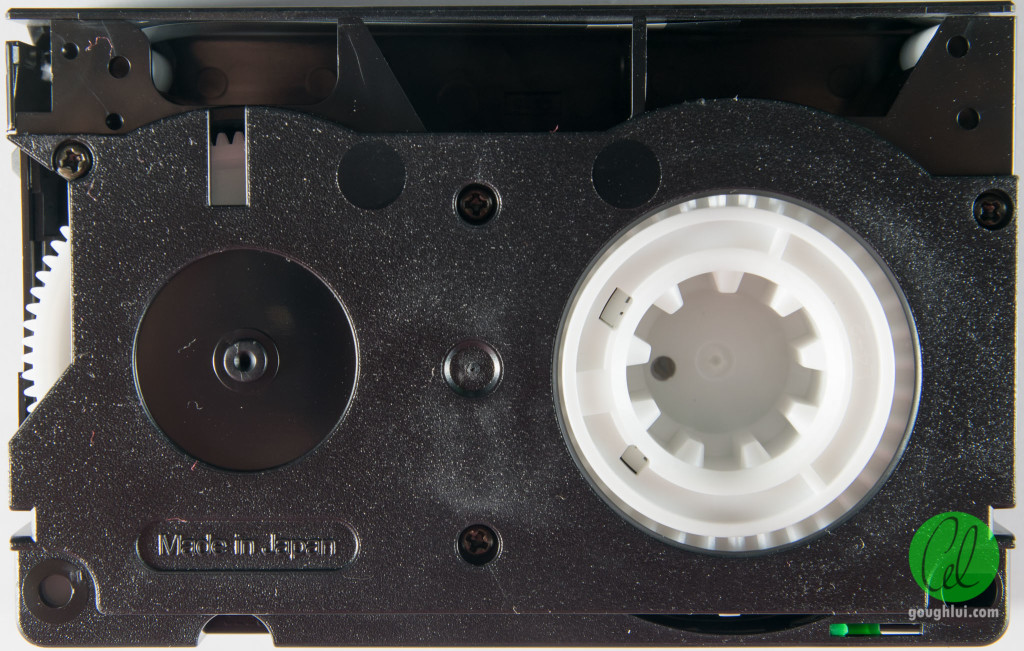
A look at the underside shows the normal arrangement – namely, the supply reel has a hub identical to regular VHS, whereas the take-up reel is driven by a geared wheel.

12-2016012810472276-1024x249

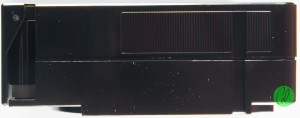
The spine has the slide switch for write protect and a space for a label to be applied.

13-2016012810482281-1024x259

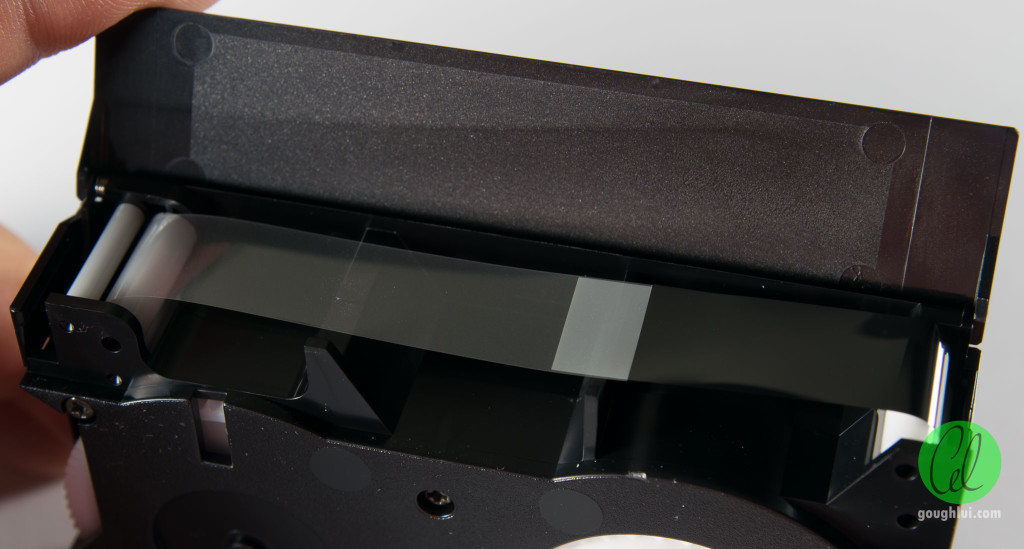
The tape-side has a thin flap, not quite the depth of the cassette, covering the tape as a form of protection. It’s not particularly robust, and can be flipped open accidentally even against its “latch”.

14-2016012810492283-1024x549

Inside, the flap appears to be patterned to prevent scratching the tape. There’s a leader tape on this too.

15-2016012810472278-300x119 16-2016012810472279-300x118

Along the gear-side, a plastic dimple is used to release the flap latch mechanism, so it can be opened normally. Note that the lid doesn’t cover the tape completely, with the tape exposed to the air on both sides.

17-2016012810462272-1024x992

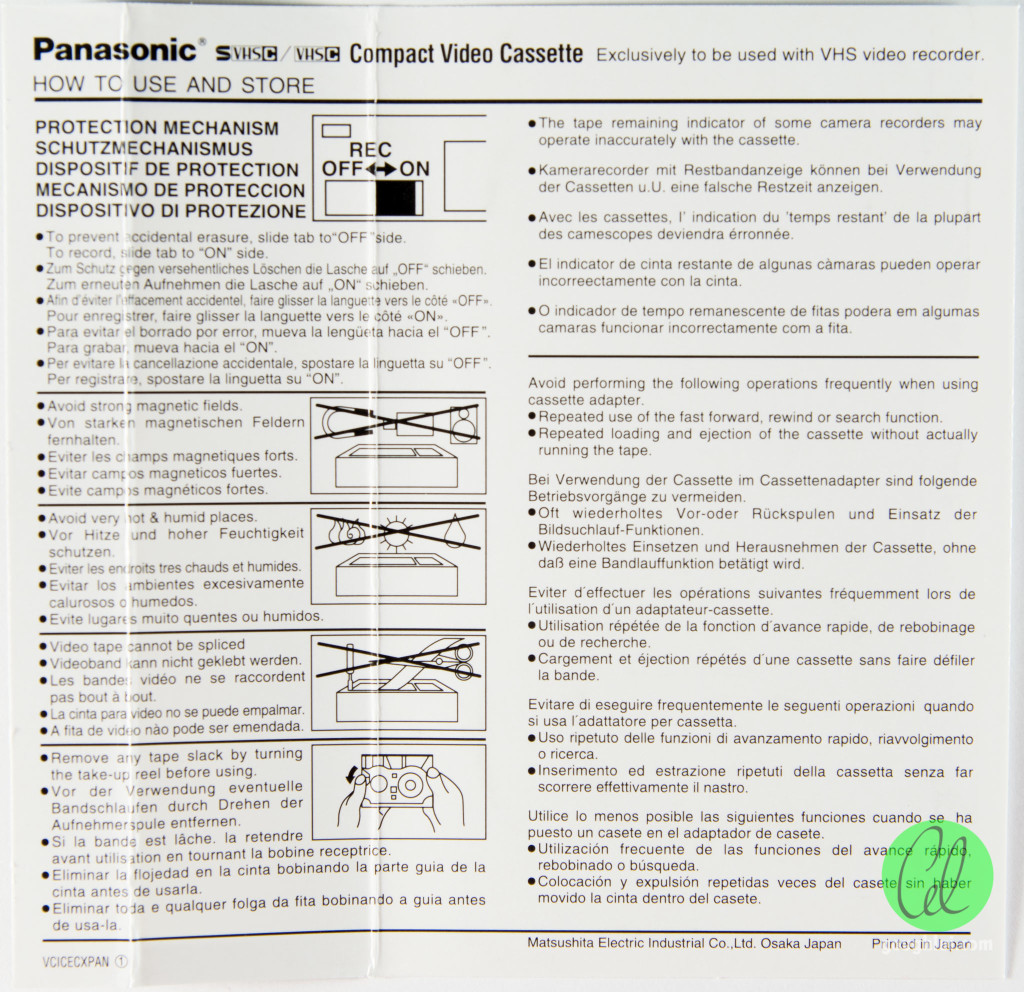
The inside printing of the outer card shows some warnings and care information for the cassette.

18-2016012810462273-300x192 19-2016012810462274-300x192

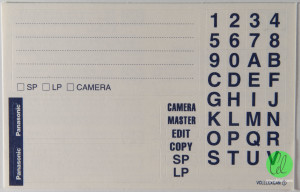
Of course, you also get labels, including those letter and number labels which like to fall off all the time – I wonder if anyone ever used them, as you’d never quite have enough letters.Lets hope it wasn’t William, Xavier or Zach’s birthday … 

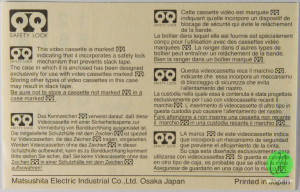
There’s also a note about the safety lock mechanism – which is basically just a reel lock mechanism. As it turns out, earlier VHS-C cassettes probably didn’t have reel-lock mechanisms, or they were not very reliable, so I can remember the JVC XR cassettes coming with cases that had specific spines designed to engage with the hub and gears to “lock” the tape from movement when placed in the case. Putting those cassettes into this case with no such features is likely to result in tape slack after transport.

Inside the VHS-C Cassette

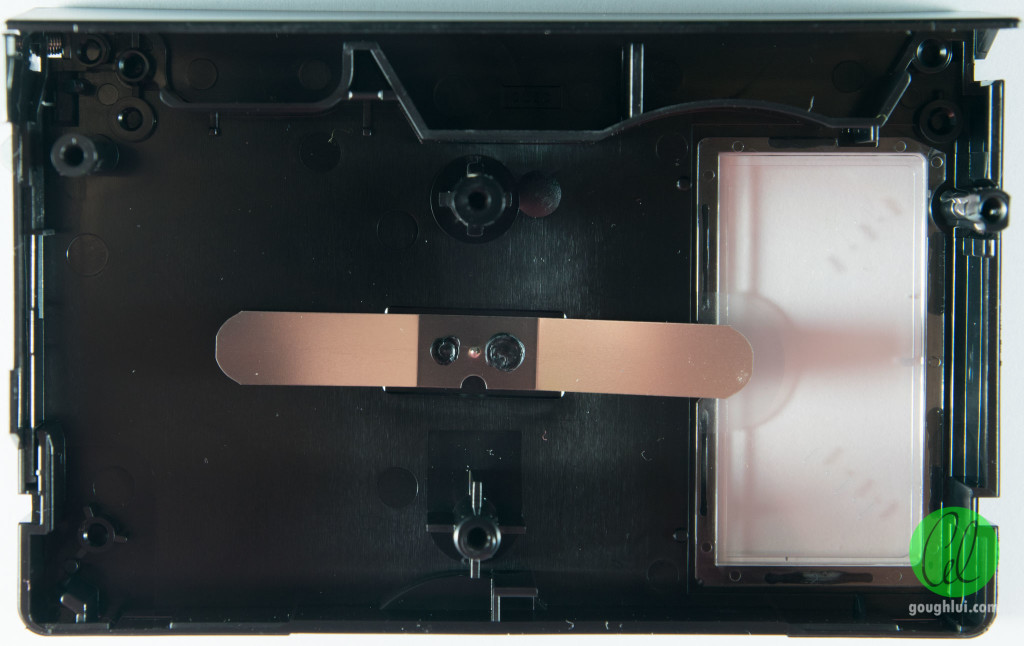
Now we get to the fun bit – taking it apart. A few screws later, and we can remove the top lid.

20-2016012813172289-1024x646

Just like the regular VHS cassette, there is a metal spring at the top which pushes down on both reels.

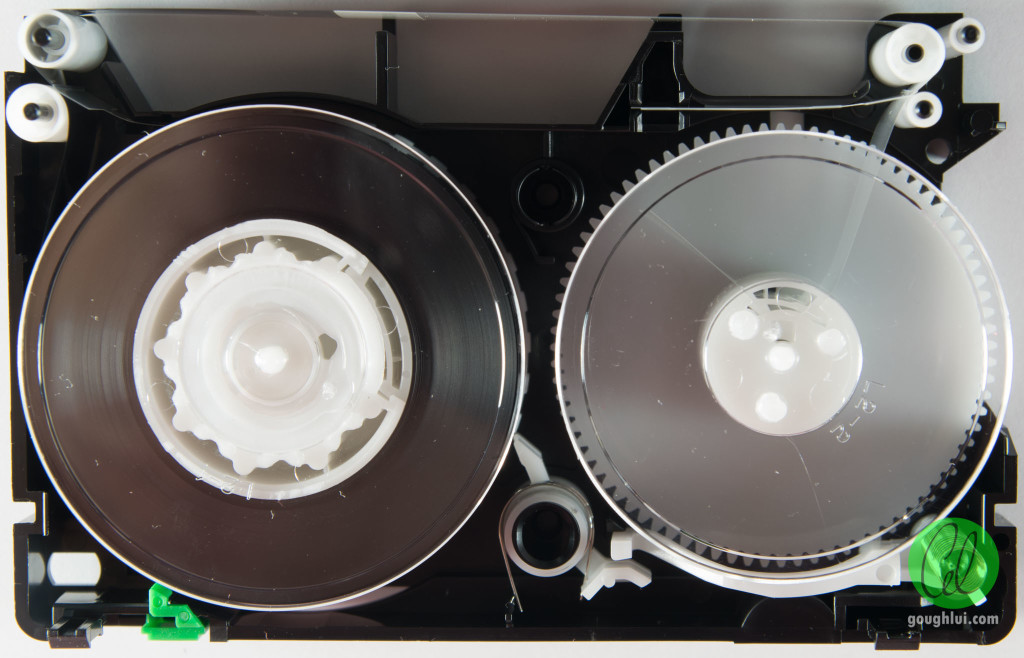
21-2016012813172291-1024x658

The two hubs are visible, with different inner diameters. The supply reel has a larger inner diameter as it needs to be VHS compatible, whereas the take-up reel has to have a smaller reel so that it can take-up all the tape with sufficient margin around the edge so that the gear drive mechanism doesn’t damage the tape. Both reels use clips to secure the tape – rather curiously, the leader tape on the take-up reel has a fairly long “tail”.

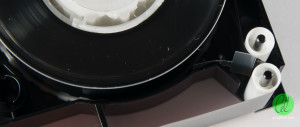
22-2016012813182294-300x127 23-2016012813182295-300x127

As a precaution on field usage, it seems that both sides of the tape have a “cleaning” wiper that pushes the tape against a roller to seal the reels against excessive dust being taken into the reel.

24-2016012813182292-1024x512

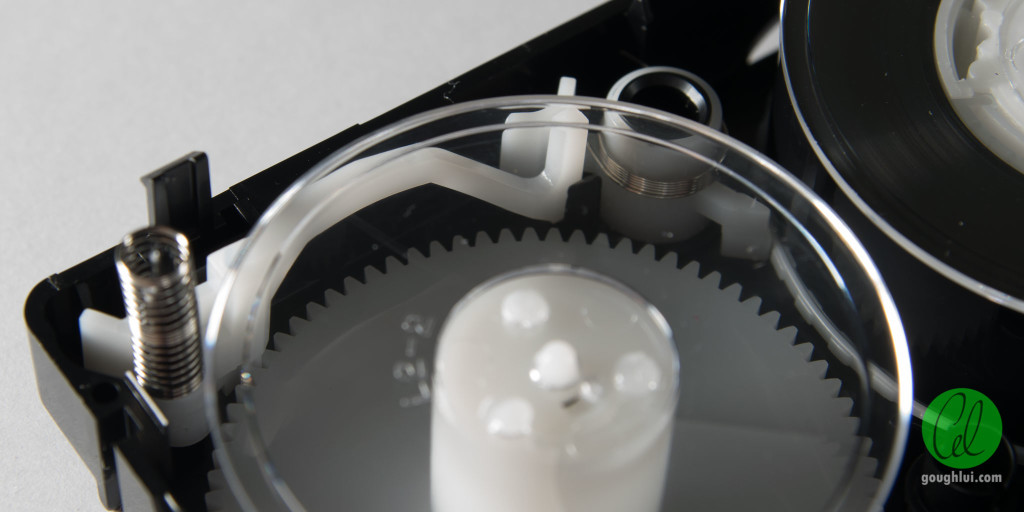
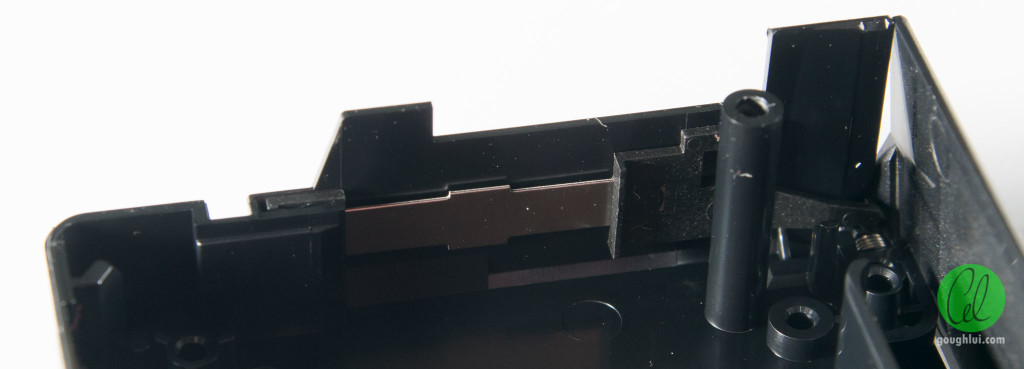
The reel lock mechanism is rather interesting – and it took me a few moments to work out how it functioned. The mechanism is made in two parts – the left lock-bar and spring secures the take-up reel. When a pin pokes through a hole on the bottom of the casing, ittilts this bar upwards, moving its edge out of the way of the toothed edge, unlocking the take-up reel. Simultaneously, it then pushes against a support strut inside the shell, which pushes against the second spring-loaded latch which rotates out of the way of the edge of the supply reel, releasing that reel as well. A rather interesting design.

25-2016012813202297-1024x369

Finally, we have a piece of springy metal at the edge of the shell, which holds the lid-flap in the closed position until the side dimple is depressed. That’s all there is to it.

The VHS-C Adapter

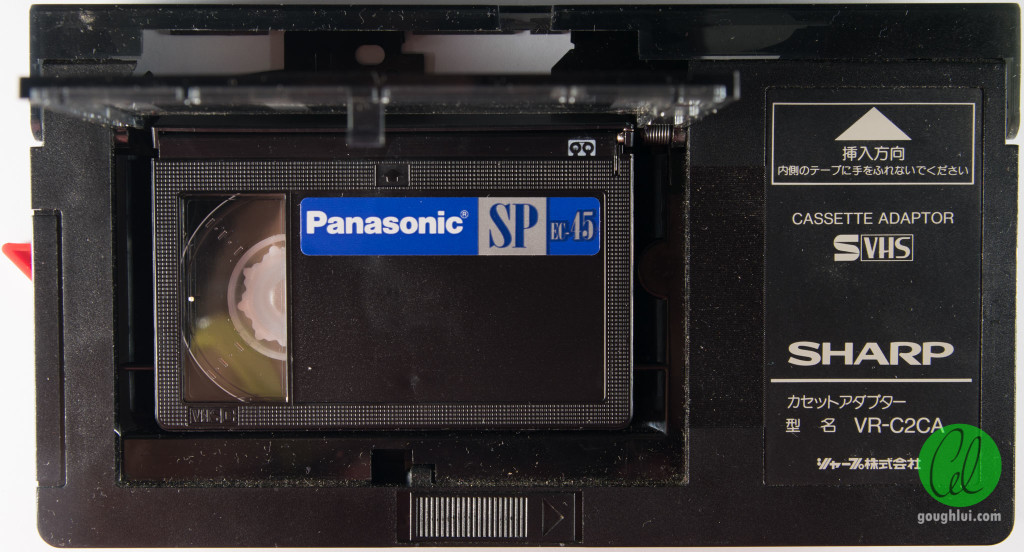
It just so happens I still have my Sharp VR-C2CA VHS-C adapter which I used to digitize my early VHS-C memories. This is a deluxe battery-operated (single AA) motorized unit. When no cassette is loaded, a red triangular tab protrudes from the side to prevent insertion into a VCR. Step 1 is to slide the bottom switch to allow the front door to open. The cassette is slid into the opening, which also releases the flap of the VHS-C cassette.

26-2016012810492284-1024x552

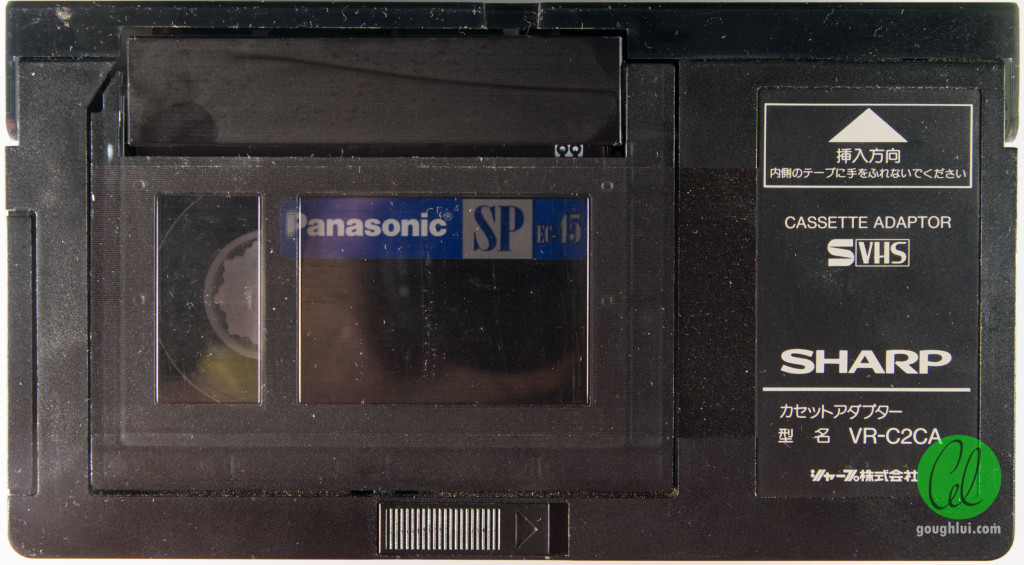
Once it’s in place, we can close the front door, which actuates the motorized system to pull the tape out of the cassette into the VHS standard position. The VHS-C casstte lid covers the gaping “hole” in the adapter when no cassette is loaded.

27-2016012810492285-1024x565

After a few seconds, the motor sounds stop, and it’s ready to be loaded and used just like a regular VHS cassette.

28-2016012810502286-1024x251

It’s a little heavier than the average VHS cassette, but it’s also a little more hollow as most of the inside is empty space so that the moveable rollers can pull the tape from the VHS-C shell to the full VHS size.

29-2016012810502287-1024x568

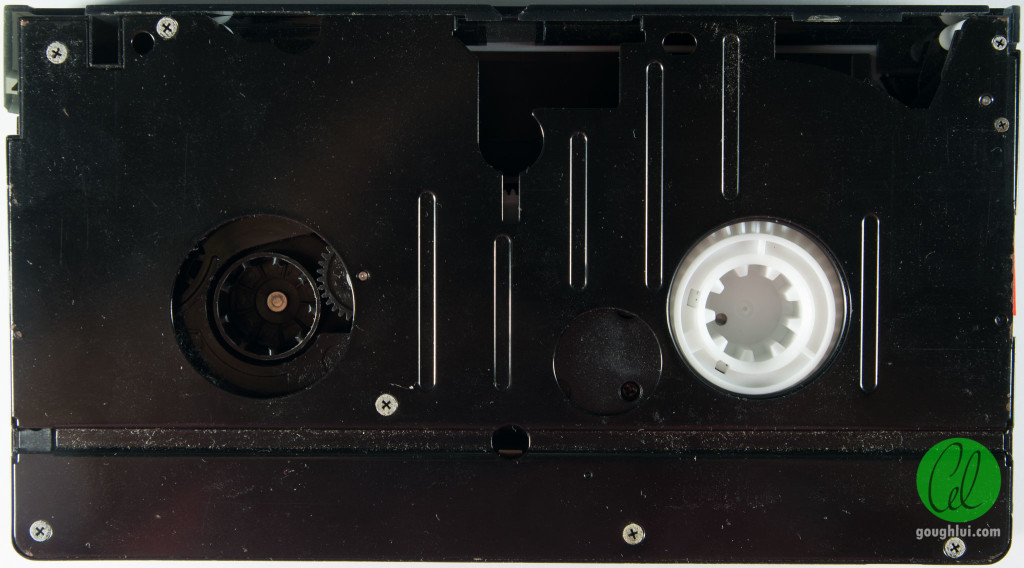
To maintain rigidity, the base plate is made out of metal. We can see the supply reel uses the original reel, but the take-up reel is connected via gearing to a plastic hub mounted inside the converter itself.

Lets just say, with modern flash-based video capture devices, things are a lot easier …

Creating Presets for Video/DVDs

Creating Presets for Video/DVDs When creating DVDs we are limited to roughly 4.4 gigs of space on a disk. This means that the variety of video tapes destined for DVD will need to be re-sized by way of re-rendering thier bit rate. If for example they are captured as AVI's, the size will be much too large for DVDs. A 2 hour video will be some 27.5 gigs!! And that would require a re-compressing of the video with a preset of 4.42 mps.

Within Ultimate S in Vegas there are a number of the usual presets already made for our purposes; but sometimes we may need a preset that more suits our needs.

Proceedure to create a preset:

1. If within Ultimate S the preset does not exist in the drop-down list then we need to go a step prior to Ultimate S and go to File/Render As...

2. In the box of selections, as an example, find "Program Stream NTSC

3. The "Customize Template..." button will now become available. Click on it.

4. Most times you will only need to change the "Average (bps):" And even so, only needing to change the top digits of the 6,000,000 (to corespond to the say 5.7mbs that you need); so it would become 5,700,000

5. Now it is necessary to re-create this preset within Ultimate-S. Select one of the standards (ie.: NTSC DV with AC3 audio - or the widescreen version, ), click Edit List, from the Template drop down, select the preset created in Vegas; make sure "Save Project markers in media file is selected", click ADD!! Then select OLD template (you may need to expand column to confirm) and remove it. Click OK, then change the title in the Preset drop-down window(IMPORTANT), Then click on the Save icon (mouse-over says "Save the current preset"). Click OK on the dialog box. Warning: IF you didn't change the title you would have inadvertently obliterated the old preset of that name.

6. This newly created preset should now be at the bottom of the list within Ultimate S.


ISSUE: No Chapter Marks in Scene Selection in DVD Architect!!! The problem stemmed all the way back to creating the preset and not selecting the check mark "Save project markers in media file" in the dialogue box that comes up in Ultimate S when clicking on the Edit List... button. The clue will be that Markers will be listed as "False" in the list on the Render panel of Ultimate S. Be warned!!

File Sharing With Mac Via Synology

Overview We sent a customer (MB - Lara Palmer) a link to download a 28GB file (DigiBeta).  The customer was on a Mac and fiber (in Tofino).  Took 3.5 hours to download.  When it finished downloading it failed with an unzip error from the Mac.  This is sending a download link from the Synology NAS.

File Sharing

When we send a link to a folder, the customer connects on the Internet and sees the files in the folder.  The customer can select one file at a time to download or the entire folder to download ("Folder" button).  If the folder is selected, then a zip of the folder is downloaded.

Solution

Instead of using the standard unzip program on a Mac people have found that using "StuffIt Expander" or "BetterZip" works.  Our customer tried StuffIt and it worked fine.

Follow-Up

I've submitted a trouble log to Synology and they are looking into it.


ACDSee - Isolate "A" side photos

Because this is a recurring process that does not seem simple enough within ACDSee, this is a quick how-to Isolate the "A" sides of the photos, after the blank "B" sides have been deleted.

  1. Despite having the "correct" folder selected on the left-hand panel in the tree; you need to look for the folder on the right titled "Categories and Folders". Use the folder selection titled: "In any of the following (1) folders:" Note if the program is filling up the page, or the right column is too narrow you may not be able to see the full path of the folder. This is critical especially if you don't Add the exact folder and neglect to "check" the "Include sub-folders" box.
  2. Also you need to put "*A.jpg" into the "Search for diles or folders named:" spot above in the section entitled "Files and Text". Now this part seems (to me at least) to be opposite of where it should go, as the next spot is entitled: "With the text:" So make sure to put that in the right spot!

A-sides

How Much Usable Space For Different Formats - FAT32, exFAT, NTFS

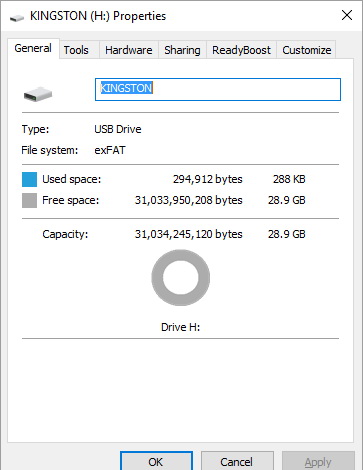
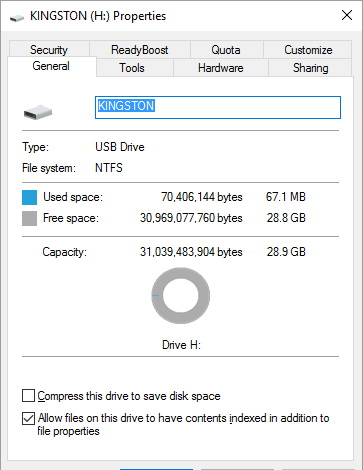
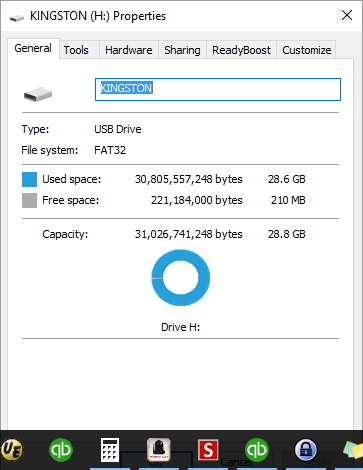
Overview When formatting flashdrives or whatever....what is the best format for maximizing space on the device.  We tried a 32GB Kingston G3 traveller and formated it for FAT32, exFAT, and NTFS.

Solution:

It really did not make too much of a difference.  The exFAT seemed to have the maximum of free space and the NTFS had the maximum of overall space.  Overall space includes both the unusable overhead space and the actual free space.  It seems that exFAT does not use a lot of overhead space.

exFAT allows for the maximum free usable space.

Images:

USB_FAT32 USB_exFAT USB_NTFS

Format SDcard to NTFS

Overview Customer wanted their videos on an 32GB SDcard.  The new card was formated in FAT32 (standard for these camcorder cards).  When I tried to format the card to NTFS, it gave me no options but FAT32.

Solution

Change the card from "optimize for quick removal" to "optimize for performance".  Once this is done you will have the option to format to NTFS.

Reference

http://superuser.com/questions/92433/reformat-sd-card-to-ntfs


Referral Commission in QB - Procedures

Overview Currently we have B2B customers that are sending us business.  These referrals break down into two categories:

  1.  The referring business handles the customer and just sends us the media to digitize.
    1. We give them a 30% discount on most services
  2.  The referring business sends the customer to us and we handle everything.
    1. We give them a 10% discount on most services.

The discount is dependent on how much we handle and how much the referrer handles.

Procedure - 30% discount

  • The media gets sent to us from the referrer.
  • We log the transfer under the referrer name plus the customer name.  For example, Media Button sends us Carl Smith.
    • The project is named MB - Smith.  This naming is used for project folders, film albums, job entries
    • When the project is entered into the job list, Media Transfer Progress sheet....on page 2 add the 30% and the discount calculations in columns K to M
    • The Quickbooks entry will be under the customer of Media Button as the job "Carl Smith"
  • The media transfer project will NOT use our contact info as this project is done under the referrer's name
  • When we create the invoice:
    • create a sub total for the transfer items
    • find and enter the B2B for 30% under the correct major heading (ie. film transfer)
    • products such as harddrives, flashdrives, etc are NOT discounted and therefore should be listed below the discount
    • send a copy of the invoice to the referrer
  • The referrer will schedule a courier to retrieve the project
  • The referrer will use our invoice to create their own invoice....we suggest that they mark up our invoice by 30% to collect their commission.
  • Once the referrer has gotten paid, we then get paid from the referrer for the amount we invoiced the referrer.

Procedure - 10% discount

  • The referrer lets us know that they have sent a customer our way.
  • The customer drops off the media.
  • We log the transfer under the referrer name plus the customer name.  For example, Media Button sends us Carl Smith.
    • The project is named MB - Smith.  This naming is used for project folders, film albums, job entries
    • When the project is entered into the job list, Media Transfer Progress sheet....on page 2 add the 10% and the discount calculations in columns K to M
    • The Quickbooks entry will be under the customer of Media Button as the job "Carl Smith"
      • the customer information: name, address, email, phone etc will be entered as this invoice will be given to the customer
  • As this project is done completely by LHF, we use all our branding
  • When we create the invoice:
    • create a sub total for the transfer items (this is done so that we have a reference for the 10%)
    • make sure the name etc is filled in for the customer (address, phone, email)
    • products such as harddrives, flashdrives, etc are NOT discounted and therefore should be listed below the discount
    • send a copy of the invoice to the customer
  • The customer will come by and pick up and pay for the project
  • Create a credit memo for the 10% owed the referrer

Creating the 10% Credit Memo

We've created a memorized 10% credit memo to make things a bit easier.  Here's the steps:

  1. Go to List and open Memorized Transaction List
  2. Select "referral fee".  This should open the Credit Memo window.
  3. From the drop-down Customer:Job, select the referrer customer, ie. Media Button.
  4. Enter 10% of the sub total on the customer's invoice....do not enter the grand total.
  5. Make sure the correct tax is applied (use G if the invoice only has G or S if the invoice has S).
  6. Enter the customer's name in the Memo box.

The credit can be applied to the customer's account against outstanding invoices, can be accumulated and paid later, or we can issue immediate payment.


RTI Tapechek XCL 300 Maintenance

RTI Tapechek XCL 300 Maintenance Overview

The VHS tape cleaning and conditioning machine maintenance notes.

Maintenance

  • Periodically vacuum the interior - at least when changing tissue
  • Instructions for changing tissue as in the lid.  The tissue is capped on each end by a thumb screw (no tools needed).  The tissue cannot be reused (unless someone figures out a way of rewinding the tissue onto the spool).
  • Clean the draw arm's spindle with Windex or such.  The centre of the spindle is a little rubbery.
  • I also cleaned the other shafts and parts with glass cleaner....careful of the scrapper as it is extremely sharp.

Virtual Dub Capture2

The Capture2 station has a "batch" executable on the desktop called VHS NTSC.bat - Shortcut which is used for both VHS and SVHS tapes. Clicking this will call up a script within a command prompt window, press any key to initiate the script. In the following dialogue box click Yes. This script resets all required registries to run Virtual Dub.
The system is set up to capture FFMpeg-v1 via the Blackmagic card which includes the SDI box that further conditions the signal. The FFMpeg-v1 codec is a highend archival format which we then upgrade to FFMpeg-v3 later once transfering files to R:/ (Thor has the required MyFFMpeg application installed to do this)
Main Keys to Operate:
F2 will call up the file system in order to name and place the video to be captured.
F5 will initiate capture
Esc will terminate capture

Canopus - Computer Connections

Capturing with the Canopus capture box is the alternative to using the BlackMagic box; this is used when the customer requests an AVI container whereby we do not need to capture with FFV1 or FFV1.3 and then convert to AVI. When dealing with VHS or SVHS there are two ways to connect to the Canopus. VHS Connection:

With the VHS deck, where there is no S-video out, the video out is simply connected to the Video In on the front of the Canopus, as are the Left and Right of the Audio. The Canopus is then connected to the computer via Firewire, thereby including both video and audio.

S-VHS Connection:

The S-VHS deck has S-Video OUT. An S-Video cable thereby is connected to the S-Video IN on the front of the Canopus. Again, the Canopus is then connected to the computer via Firewire (video and audio included).

This post will continue...

Issue with the Canopus on Capture 2

If Vegas does not recognize the  Canopus device - try powering everything down. Then disconnect the  Canopus firewire as this is powering the  Canopus, it will then re-set the  Canopus when powering back up. This has seemed to solve this issue.

FFmpeg - fixing video duration

Overview Had a capture going with Vegas where the capture crashed near the end.  The capture program ( vidcap ) did dump a avi file but the avi file's duration or length was only 50 seconds instead of 35 minutes.  Vegas will not load the whole file, just the first 50 seconds!

Solution

Rewrote the video file using ffmpeg...this also fixed the duration.

Here's the script:

setlocal
SET ffmpegpath=%APPDATA%\myFFmpeg
SET PATH=%PATH%;%ffmpegpath%
ffmpeg -i "u:\04 - Lord Howe Island\CaptureTemp_0000.avi" -c:v copy -c:a copy "good0.avi" -f null 1>out_error3.txt 2>out_error4.txt -

Vegas Not Loading Audio with the Video

Overview Scanned in a U-Matic tape using Blackmagic Media Express.  This created a AVI file with a UYVY codec and PCM 24bit  codec for audio.

Sample:

General
Complete name                            : R:\Business RAW\U-matic\2016\16-04-20 Pereria Umatic tape\tape 02.avi
Format                                   : AVI
Format/Info                              : Audio Video Interleave
Format profile                           : OpenDML
File size                                : 4.12 GiB
Duration                                 : 3mn 26s
Overall bit rate                         : 171 Mbps
Video
ID                                       : 0
Format                                   : YUV
Codec ID                                 : UYVY
Codec ID/Info                            : Uncompressed 16bpp. YUV 4:2:2 (Y sample at every pixel, U and V sampled at every second pixel horizontally on each line). A macropixel contains 2 pixels in 1 u_int32.
Duration                                 : 3mn 26s
Bit rate                                 : 168 Mbps
Width                                    : 720 pixels
Height                                   : 486 pixels
Display aspect ratio                     : 3:2
Frame rate                               : 29.970 fps
Standard                                 : NTSC
Color space                              : YUV
Chroma subsampling                       : 4:2:2
Compression mode                         : Lossless
Bits/(Pixel*Frame)                       : 16.000
Stream size                              : 4.03 GiB (98%)
Audio
ID                                       : 1
Format                                   : PCM
Format settings, Endianness              : Little
Format settings, Sign                    : Signed
Codec ID                                 : 00001000-0000-0100-8000-00AA00389B71
Duration                                 : 3mn 26s
Bit rate mode                            : Constant
Bit rate                                 : 2 304 Kbps
Channel(s)                               : 2 channels
Sampling rate                            : 48.0 KHz
Bit depth                                : 24 bits
Stream size                              : 56.7 MiB (1%)
Alignment                                : Aligned on interleaves
Interleave, duration                     : 1033 ms (30.94 video frames)

GeneralComplete name                            : R:\Business RAW\U-matic\2016\16-04-20 Pereria Umatic tape\tape 02.aviFormat                                   : AVIFormat/Info                              : Audio Video InterleaveFormat profile                           : OpenDMLFile size                                : 4.12 GiBDuration                                 : 3mn 26sOverall bit rate                         : 171 Mbps VideoID                                       : 0Format                                   : YUVCodec ID                                 : UYVYCodec ID/Info                            : Uncompressed 16bpp. YUV 4:2:2 (Y sample at every pixel, U and V sampled at every second pixel horizontally on each line). A macropixel contains 2 pixels in 1 u_int32.Duration                                 : 3mn 26sBit rate                                 : 168 MbpsWidth                                    : 720 pixelsHeight                                   : 486 pixelsDisplay aspect ratio                     : 3:2Frame rate                               : 29.970 fpsStandard                                 : NTSCColor space                              : YUVChroma subsampling                       : 4:2:2Compression mode                         : LosslessBits/(Pixel*Frame)                       : 16.000Stream size                              : 4.03 GiB (98%) AudioID                                       : 1Format                                   : PCMFormat settings, Endianness              : LittleFormat settings, Sign                    : SignedCodec ID                                 : 00001000-0000-0100-8000-00AA00389B71Duration                                 : 3mn 26sBit rate mode                            : ConstantBit rate                                 : 2 304 KbpsChannel(s)                               : 2 channelsSampling rate                            : 48.0 KHzBit depth                                : 24 bitsStream size                              : 56.7 MiB (1%)Alignment                                : Aligned on interleavesInterleave, duration                     : 1033 ms (30.94 video frames)

Problem:

When the AVI file is dropped onto the Vegas timeline there is no audio track.

Solution:

Use myFFmpeg to transfer the video and convert the audio to 16 bit PCM.

How:

Open up myFFmpeg and drop the file(s) onto the window.

Use the preset "AVI pass thru, PCM 16 bit"  (on Apollo2).

The Armstrong Experiment

The Armstrong Experiment - For Use With: Overblown Extreme Overexposure
This is an example of an extremely overblown capture of an extremely over-
exposed film that had to be sent away for a customer to get developed. The
Developers in this case send us the film back as a negative and black/white. You
will note that the film is very dense, dark, opaque (much emmulsion on the film;
which stands to reason being that it is a negative of overexposed film).
As such we capture with vegas as a positive and invert it once on the vegas
timeline. With this test we have captured the film (Armstrong) with gamma set to
zero, and in 4 captures set the exposure to 10 o'clock, 12 o'clock, 2 o'clock,
and the extreme 4 o'clock. In each case each showed as very black on the
timeline. Then when inverted, they all showed as very white.
Then next step was to capture again at 4 o'clock and also push the gamma to +30.
A faint ghostly image is now captured. It dose not seem to matter whether the
gamma is added during capture of after on the timeline. Only the customer could
fully appreciate the ghostly image knowing the context of the shooting.
In the extreme a capture was done with the exposure set to 4 o'clock and the
gamma set to 40 whereby on the timeline a very pixelated image can be determined
on some parts of the film. The image is better seen by not inverting the clip
and watching the contrast in the darker rather than lighter form as the textures
are more distinguishable.
Black and White issue:
When attemping to use the Sony Black and white plugin in the mix it only appears to remove definition,
flattening the image, and providing less contrast. Which makes one wonder why the developers bother developing the film in B/W.
Other settings in Vegas:
On the levels, the Input Start adds darker contrast, and for this example was set to 0.463
The Input End was set to 0.816; the more (less than initial setting) that is added the more broad became the arch of the histogram,
also more disperse was the Waveform, and more disperse became the Vectorscope.
The Output Start was left at zero as it did the opposite of the above, and washed the image to a grey and flat image.
The Output End was set to the mid-point, where the 0 turned the screen black, and the extreme right dispersed the
vector scope and waveform beyond a useful image.
Gamma if not set during capture with the Retro was best set to about 1.967; whereby when the Retro Gamma was set to 30,
the gamma on vegas was only set to just below the 1.0 initial setting to about 0.975. This also tends to flatten the histogram and
disperse the vectorscope and waveform when the slider is moved to the right.
In the end these settings can be set to your liking, ie. to adjust for contrast and texture to better determine the ghostly image.
In another attempt to capture, we used stab on, gamma 24, exp 4 (max), and sensor at 12. This proved better results.

Vegas Capture Settings

Overview This post will itemize peculiar settings, their functions and scenarios in Sony Vegas that can sometimes stump you while capturing media.

------------------------------------

Scenerios/Issues

One issue that happened on SPACE when capturing for VHS:  every time the tape dropped it's timecode (gap in the video) the capture stopped.  The capture stopped every minute or two because there were lots of minor gaps.  All the settings under the capture preferences (both general and capture tabs, etc) windows were the same as Capture2.  Yet Capture2 worked fine as it captured the same tape as one video file....not broken into clips.  Enable DV scene detection (capture tab) was unchecked and the Enable DV device control (general tab) was checked.  The solution was to un-check "Enable DV device control".

------------------------------------

Enable DV scene detection

This setting is in the Sony Video Capture component of Sony Vegas, used to capture video footage. It is found under Preferences, under the Capture tab, and is at the top of the items of Capture Preferences.

When "Enabled" (box is checked) this option directs Sony Video Capture to independently capture "scenes" automatically thereby resulting in a list of clips captured in the chosen folder. When not checked Sony Video Capture will capture the entire media as one avi clip. If the client is intending on using clips this feature is handy, but generally we capture the entire media all at once; therefore we leave the box UN-checked.

------------------------------------

Enable DV device control

This is found under the Capture window's preferences selection under the Capture tab.   This is used for the Vegas capture to control the VCR/VTR.  Typically we use this to control the miniDV decks that connect directly to the PC via a firewire (IEEE 1394).  However, it appears that when we have this selected and we are using the Canopus ADVC 300 it causes the captured file to break up into clips every time there is a break in the time-code.  This can be VERY annoying as the tape keeps going and the capture stops.....this means a LOT of rewinding and restarting.

Leave this un-checked UNLESS you are controlling a miniDV deck....especially when using the Canopus ADVC 300.

One advantage to having this checked is that the video capture stops at the end of the tape.  With this un-checked the video capture keeps going.


------------------------------------

DV Tape Capture - DV or FFV1

Overview When capturing archival videos we are using the FFV1 codec.  Virtualdub is being used to capture directly into FFV1 within a AVI container.  Then we are using myffmpeg to convert these files into FFV1.3 codec in a MKV container.  It must be done in 2 steps as Virtualdub cannot capture directly into the final format..

Summary

We've set up a DV-NTSC shortcut on the desktops that opens up Virtualdub with settings to read the DV tape directly via firewire ( IEEE 1394 ).  One can also use Vegas to capture the DV tape.  The biggest difference between the two capture programs is that Vegas captures the camera/scene settings such as "white balance" etc.  It also appears that Vegas capture up to 48Hz and Virtualdub may only capture 32KHz.

Prefer Vegas capture for miniDV etc.

Details

Contacted Peter Bubestinger-Steindl <p.bubestinger@das-werkstatt.com> and here was his response:

About your question regarding DV:

The DVA-Profession preset for Virtualdub is for capturing DV over Firewire. I've ran tests to confirm that this method is able to capture the original DV-bitstream as-is from the tape.

That is the way we transfer most of our DV collection.

In some cases, where the data on the tapes is in a very bad condition, we sometimes fall back to capturing the SDI output of the DV deck, and then transcoding that into FFV1.

Both methods have their pros and cons.

Method 1: DV over Firewire

=====================

+) Capture original stream as-is. Including bitstream errors.

This allows full access to the original data, and gives the most options for later restoration.

+) Smaller files than with FFV1, due to the fixed DV bandwidth of

approx. 270 MB/Min.

+) If more than 2 audio channels are used, all of them are preserved

since Virtualdub currently only allows capturing the first 2 channels from SDI.

+) If 32kHz / 12bit(non-linear) audio was used for the recording, the

interpolation to 16bits linear is done on the fly by Virtualdub and saved as the main audio track in the AVI.

If at any later point in time, one wants to access the original 12bit stream, it is still available inside the original DV video track.

+) AVPreserve's "DVAnalyzer" tool can be used to do QC on the ingest

material.

No need for visual QC. This saves a lot of time, and has a better result rate than visual QC.

-) Mid-stream changes of e.g. Samplerate, or "undefined-tape" gaps between recordings however, do cause problems with transcoding later on.

Depending on the application(s) used for handling the files afterwards.

Method 2: Capture SDI output

=====================

+) All errors on the tapes are being handled in real-time by the

error-concealment mechanisms of the replayer. The resulting video (transcoded to FFV1) is then stabilized and any further editing/transcoding behaves correctly.

+) Mid-stream changes of audio samplerate, gaps on the tape, etc. are
"manifested" since they are converted to fixed samplerate and "real"

images on the output.

-) Depending on the error-handling/error-concealment mechanisms built-in the replayer, the resulting image might look okay, but there is no way for re-doing any better restoration later on, since the error parts are

- literally - concealed.

-) Slightly larger files than the original DV stream.

When there's time, I'm going to add this to our "Video Archiving FAQs"

[1] section, where I mention DV..

Kind regards,

Peter

== References:

[1]

http://download.das-werkstatt.com/pb/mthk/info/video/FAQ-digital_video_archiving.html#digital_source_capture