printing

Master Discs

When a project is completed, we create one additional copy for archival purposes.  If there are multiple discs provided as the final product, there must be a master disc for each different disc. Master discs can be created any format, such as Audio CD, Data CD, Video DVD, Data DVD, Blu-ray, etc, but it must be in the final deliverable format. In some cases there is no need to create a master disc, such as for a VHS to DVD transfer because we will never require that media again.

When printing master discs, we use an template file we created in Epson Print CD which can be found at:

  • E:\TMM\Templates\Labels\Master Disc Label Template.ec3

Or, you can download it here.  You can follow the same printing guidelines from the Printing DVD Case Covers & Disc Surfaces article.

A little bit of history...

This template file was created back in 2003, and the structure hasn't been modified since.  As of January 2009, we have around 200 master discs.

Approximate master discs per year:

2003 1
2004 7
2005 23
2006 62
2007 67
2008 41

These discs used to be stored in thin jewel cases and just stored on a cd-rack.  On January 29th 2009, we transferred all the discs out of the jewel cases and into spindles.  This uses much less space, as they were getting to be hard to manage, and difficult to search through them.
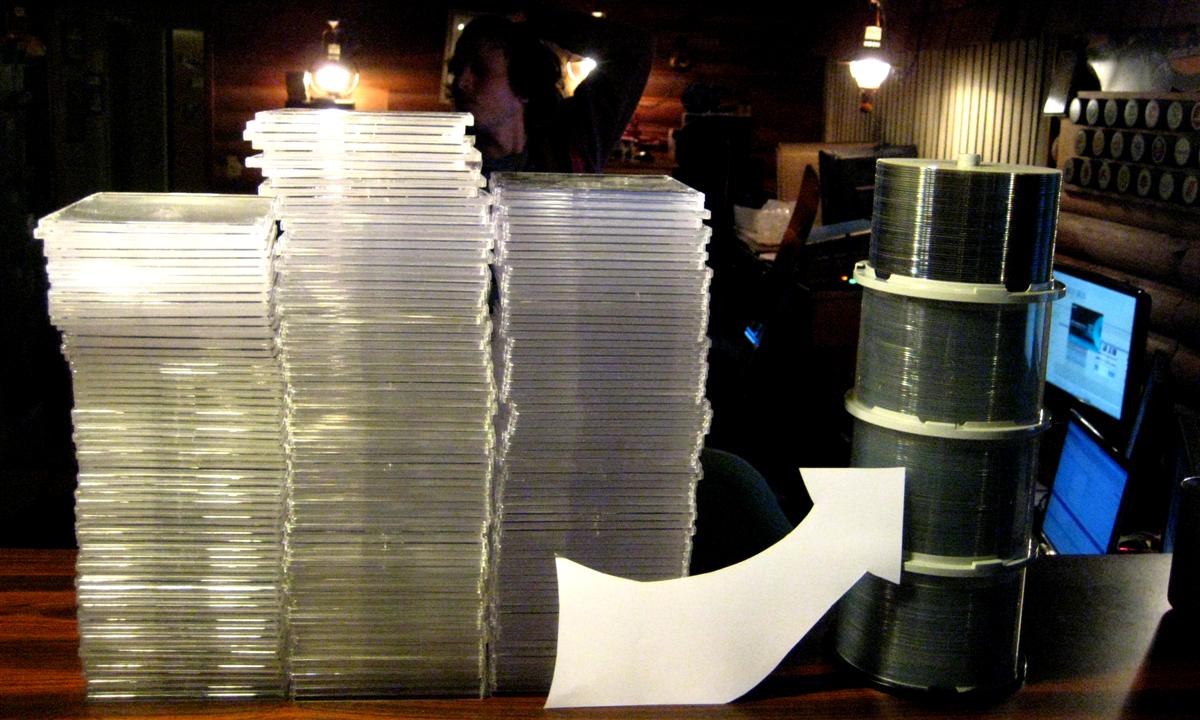
img_2932

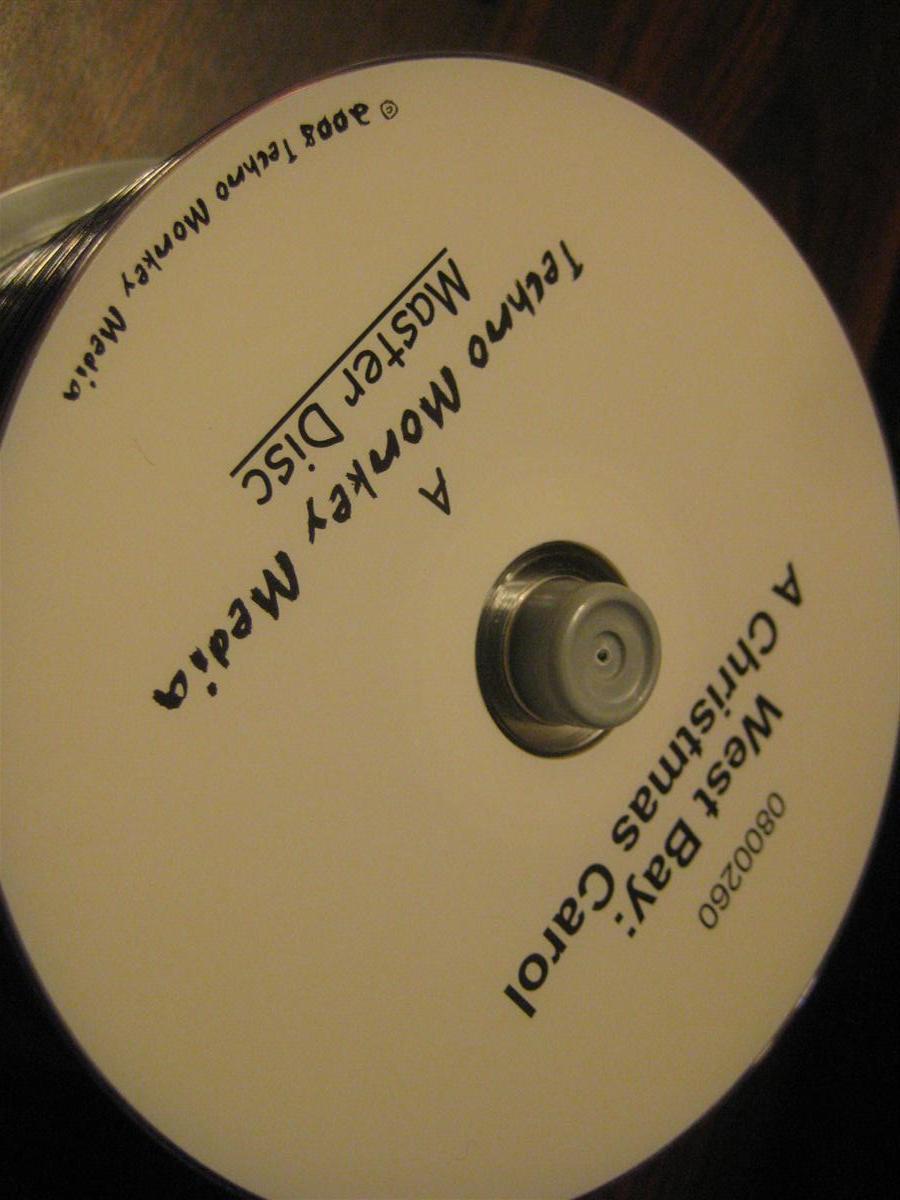
img_2934The disc surfaces...

The surface of the disc is minimal in content, and easily displays the following:

  1. Project title
  2. Project number
  3. This is a master disc

When are they created?

Master discs are typically burned and printed on at the same the project is being duplicated.  Otherwise, a master disc must be burned when the project is being backed-up.

(dated) Printing DVD Case Covers & Disc Surfaces

Tools Used in this Process

DVD Media Taiyo Yuden DVD-R 4.7 GB White Ink Hub Print 16x
Case Cover Paper Kirkland Professional Glossy Inkjet Photo Paper
Printers Epson R260 (Primary), Epson R220
Software Adobe Illustrator, Adobe Photoshop, Epson Print CD

Locating the Files

If the project has been backed up, you will find the labels inside the following folder:

  • Disc Surface: E:/TMM/Labels/#Project Number# - #Project Name#/Disc Surface.ec3
  • Case Cover: E:/TMM/Labels/#Project Number# - #Project Name#/DVD Case Cover (Edit *).psd
  • or Case Cover: E:/TMM/Labels/#Project Number# - #Project Name#/DVD Case Cover (Edit *).ai

If the project is still active, you will find them at:

  • Disc Surface: K:/#Project Name#/Labels/Disc Surface.ec3
  • Case Cover: K:/#Project Name#/Labels/DVD Case Cover (Edit *).psd
  • or Case Cover: K:/#Project Name#/Labels/DVD Case Cover (Edit *).ai

Printing DVD Case Covers from Illustrator

  1. Open Illustrator file
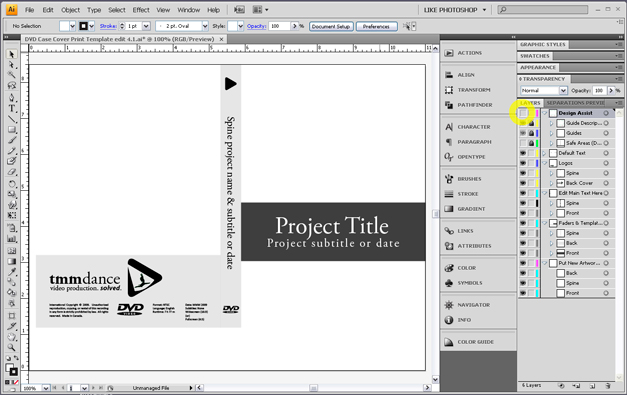
  2. Turn off "Design Assist Layer."

    illustrator-print-01

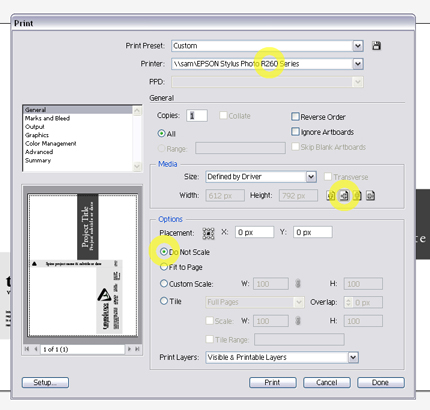
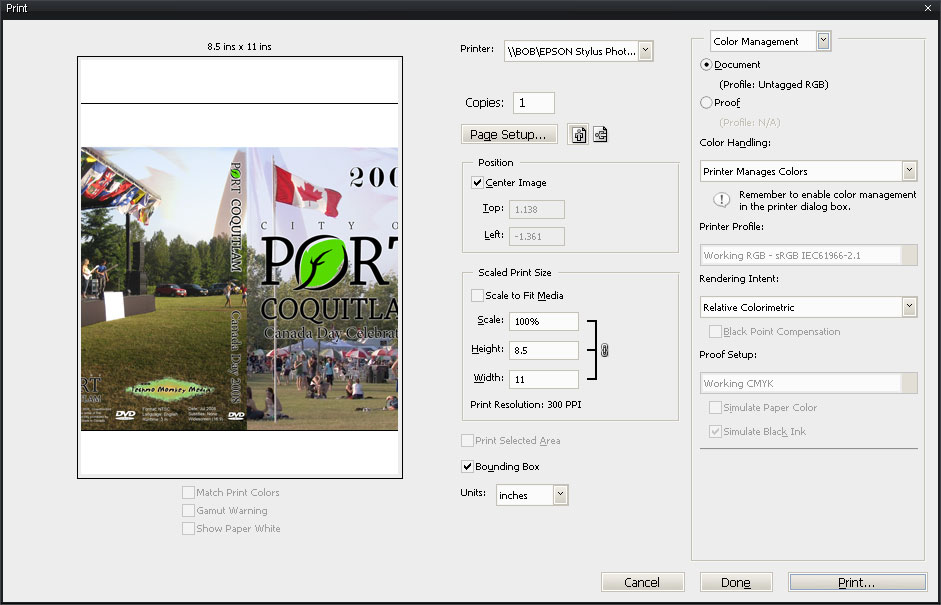
  3. In the main menubar, click on FILE then select PRINT.  It will bring up the print dialogue as seen below. From top to bottom of the dialogue, check that the printer is set to EPSON Stylus Photo R260 (preferred), check under the "media" section that the first landscape orientation button is selected, and check that under placement "Do Not Scale" is selected. For most cases, leave Print Layers to "Visible & Printable Layers."illustrator-print-02
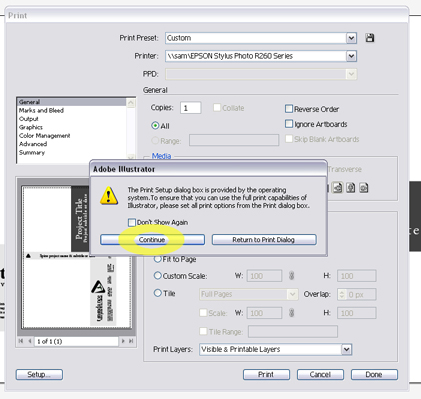
  4. Click Setup in the bottom left corner of the print dialogue. The following message may display. If it does, click continue. If not, then proceed to the next step.illustrator-print-03
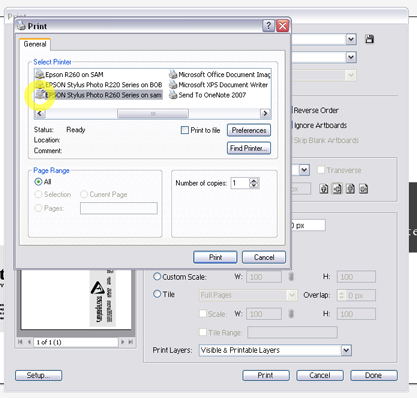
  5. The windows printer dialogue box will appear. Make sure that the same printer is selected from the earlier steps. (Epson Stylus R260 from this example) Click the Preferences button.illustrator-print-04
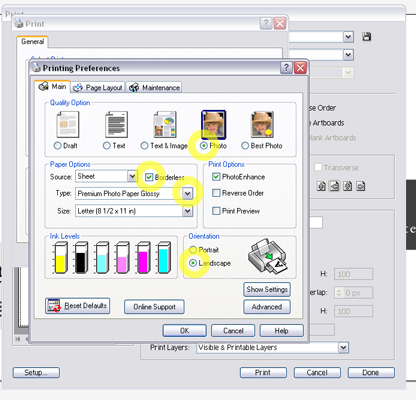
  6. The preferences dialogue will open. Set Quality to "Photo." Set Type to "Premium Photo Paper Glossy." Check Borderless on. Note that Landscape orientation should be set automatically.illustrator-print-05
  7. Click "OK" from the preferences dialogue. From the Windows print dialogue, click "Print."
  8. Now that you are back in Illustrator's dialogue, choose the number of copies you want to print and place that many glossy photo paper sheets into the selected printer.
  9. Finally, click "print" from Illustrator.

When you have a few printed and you're ready to cut and bag 'em, check out the process for Assembling DVD Cases.

Printing DVD Case Covers from Photoshop

    1. Open Photoshop file
    2. Make sure the Guides Layer is turned off.
    3. In the main menubar, click on FILE then select PRINT.  It will bring up the print dialogue as seen below.

      default-print-screen

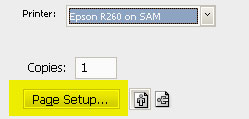
    4. Select Printer (preferred printer is the Epson R260 on SAM) and click on Page Setup.

      page-setup

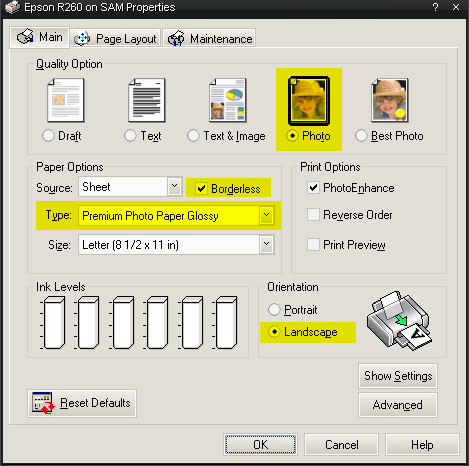
    5. page-setup-settingsSet the options for the printer.  The following settings are for the Epson R260, and most settings are the same for the Epson R220.Quality Option: PhotoType: Premium Photo Paper Glossy (for R220, this is Premium Glossy Photo Paper)Borderless: check the box (must be done after selecting Paper Type)
      Orientation: Landscape

    6. Press OK to close dialogue box.
    7. You will be back in the print dialogue (seen in step 4), and push Print to continue.
    8. At this stage, Photoshop is sending the document to the final dialogue.  Before continuing, get up and off the computer and put the desired number of sheets of  inkjet photo paper into the printer you selected back in step 4.
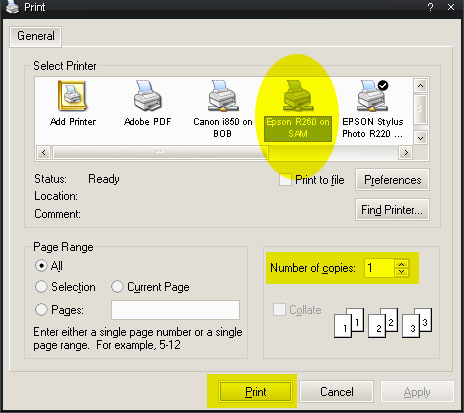
    9. Back on the computer, verify the printer is the same that you chose back on step 4.  If it isn't, then hit Cancel and start back from step 3.  That typically fixes this rare bug.

final-print

  1. Choose the number of copies you want to print.  This should be the same as the number of sheets you put in the printer in step 8.
  2. Push Print.

When you have a few printed and you're ready to cut and bag 'em, check out the process for Assembling DVD Cases.

Quick Printing DVD Case Cover Tips

  • Instead of going through the menu on step 3, press CTRL+P to bring up the print dialogue.
  • After you've specified the settings once, they should be the same the next time you open the print dialogue.  This should work even if you open another cover to print, but you will have to start over if you close Adobe Photoshop.

Printing Disc Surfaces

    1. Open Epson Print CD using one of two methods.  Either double click on a Disc Surface.ec3, which will open the Epson Print CD program with the file ready to print, or open the Epson Print CD program (from the start or program menu, and then drag the jpg disc image onto Epson Print CD's print image.
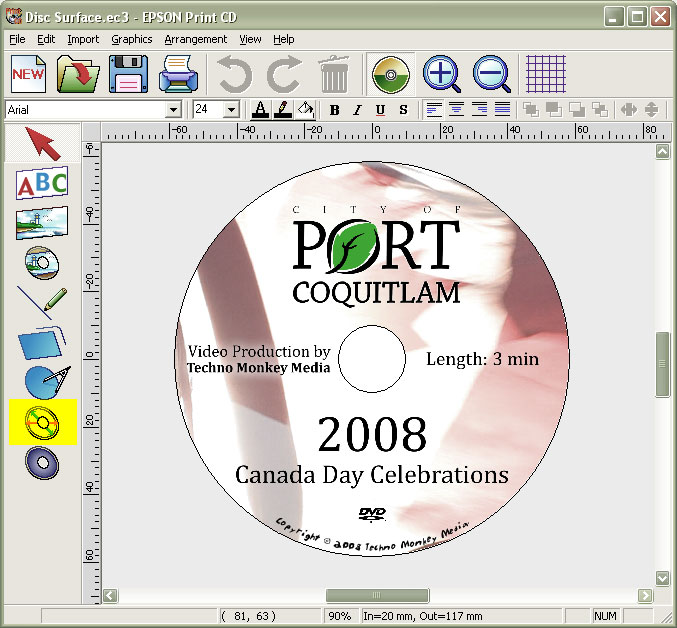
    2. Open the Inner/Outter Diameter Setting, by clicking on the yellow disc icon in the left toolbar, as highlighted in the screenshot below.

      where-is-button

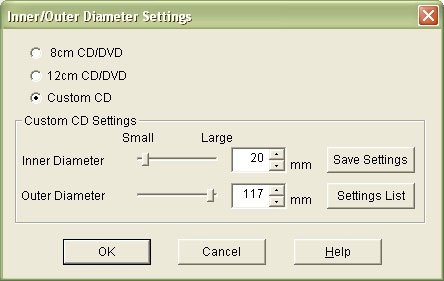
    3. Ensure the Inner Diameter and the Outer Diameter are set correctly using the following table of media as a guide.

diameter

Taiyo Yuden DVD (Most Common) Inner: 20, Outer: 117
Tiayo Yuden water-shield DVD Inner: 23, Outer: 117
RiData DVD Inner: 20?, Outer: 117?
CDR's Inner: 20?, Outer: 117?
    1. Press OK, and return to the main window.
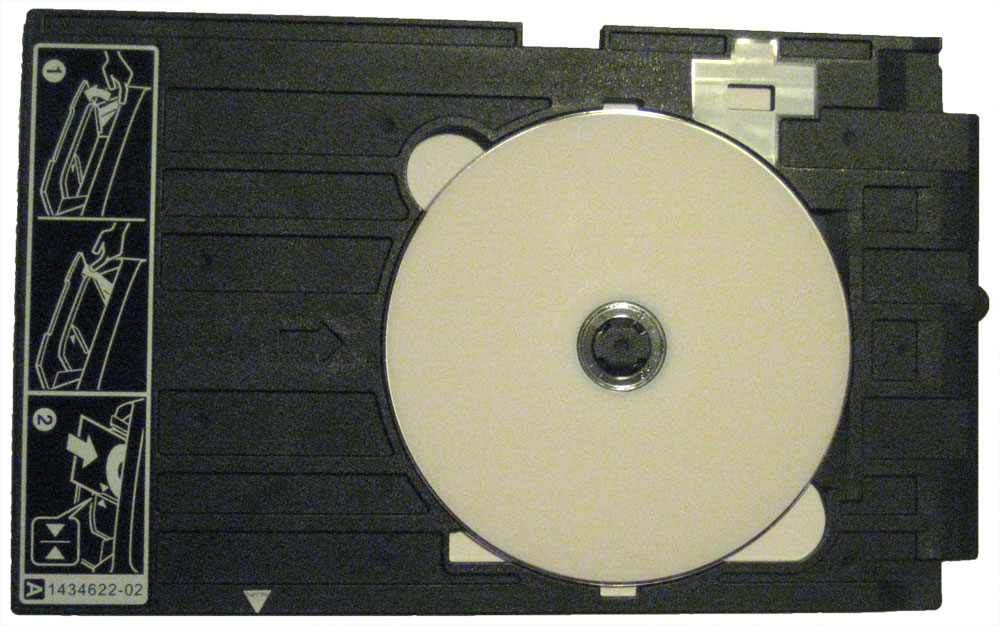
    2. Get up and off the computer and grab your inkjet printable disc. Place it in the holder tray as seen below.

      disc-tray1

    3. If the printer is not switched to print discs, you will need to switch it.

      [flv width="320" height="260"]http://www.lifetimeheritagefilms.com/knowledgebase/wp-content/m_uploads/2008/12/setting-up-printers-for-disc-printing_400kbps.flv[/flv]

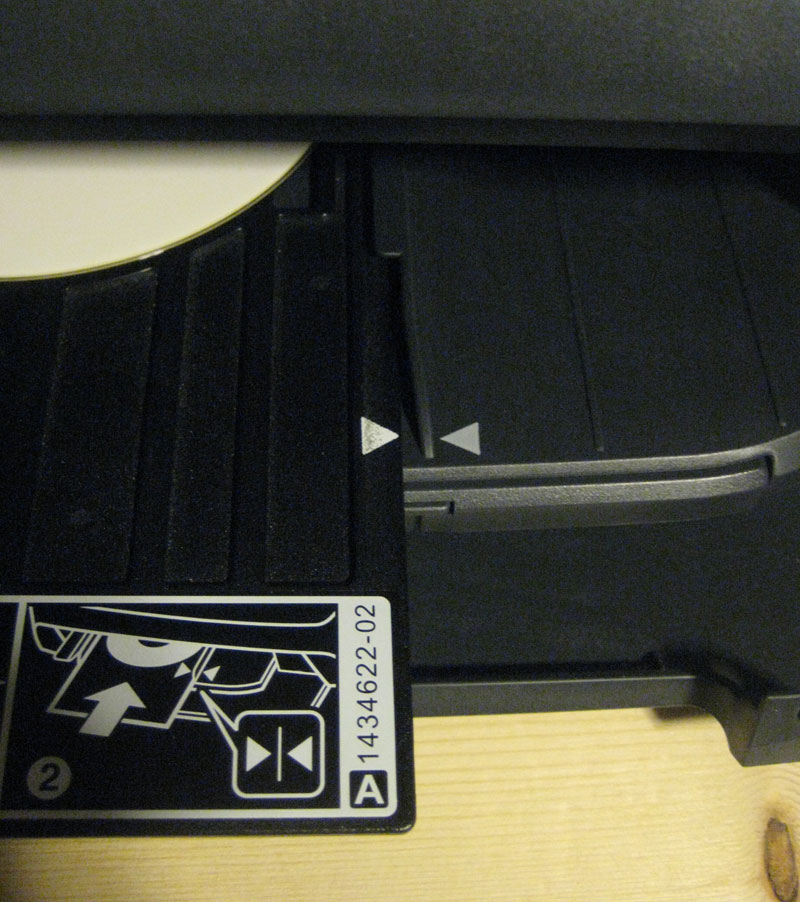
    4. Insert the tray into a printer, matching up the two white triangles.

line-up-triangles

  1. Back on the computer, press the big print button up in the top toolbar in Epson Print CD.
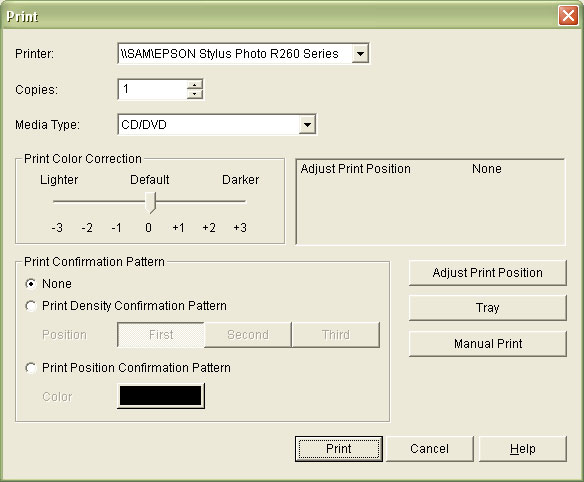
  2. Make sure the printer selected is the printer you put the disc in, then push Print.

    print-box

  3. You will always be prompted with an are you sure warning box - push OK.

    are-you-sure

  4. Your disc will begin printing.  It should take about two minutes to complete.
  5. Take the disc out of the tray and place it in a spindle.  Make sure that it is obvious that the spindle is for completed discs by labeling it with a sticky or piece of scrap paper.
  6. Go back to Step 5 and repeat until you have printed the desired number of discs.

Quick Printing Disc Surface Tips

  • When you're certain that your settings are correct in Epson Print CD, you can glaze over steps 8 thru 10 by just pushing CTRL+P then  ENTER, then ENTER again.  The program may lag for a sec, but you will be free to go back and swap more discs.  This helps because when your in the mad rush of swapping discs, the only interaction with the computer will be jumping over to push that combination really fast.  Don't worry about speed either, I haven't yet done it "too fast".